meiss crossing x lifestyle blog
  • Home
  • About
  • Blog
  • Contact
    • COLLABORATIONS
    • DISCLAIMER
  • Our favs
    • SAFER INGREDIENTS
    • FOR THE HOME
    • HER CLOSET
    • HIS CLOSET
    • FINN'S CLOSET
    • BABY
    • TODDLER

Weekend DIY : It's LIT!

3/18/2017

1 Comment

 
Picture
Picture
Picture
Picture
Let’s talk lighting!

When buying a house, there are always purchases to be made, especially when you want to fill your home with beautiful things. Mitch and I have taken the approach of taking our time and shopping for things we love.

First it was furniture, then curtains, and now we are wanting to turn our favorite corner into a well lit reading nook.  After plenty of time on Pinterest and Houzz looking for fun lighting ideas, we found the Color Cord Company! They offer the best selection of lighting cords, shades, and bulbs to add to any space. Even better, they provide the parts and pieces to do it yourself!

As soon as we found these awesome products we couldn't wait to get started. ​
Picture
Picture
Picture
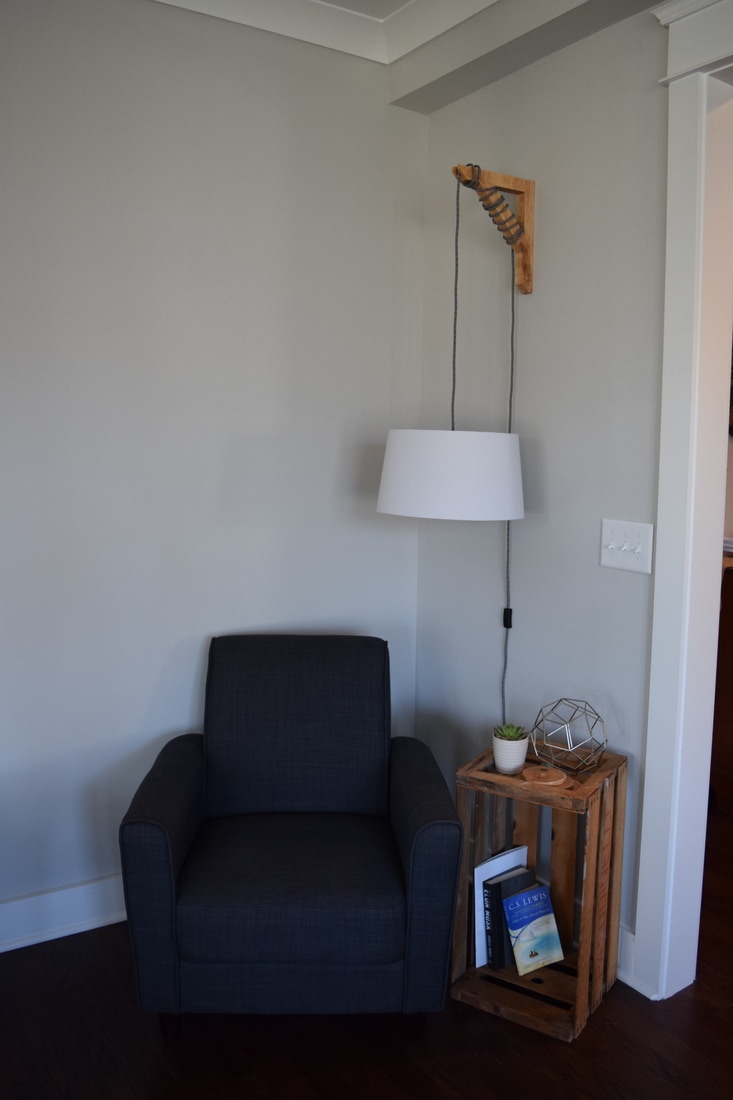
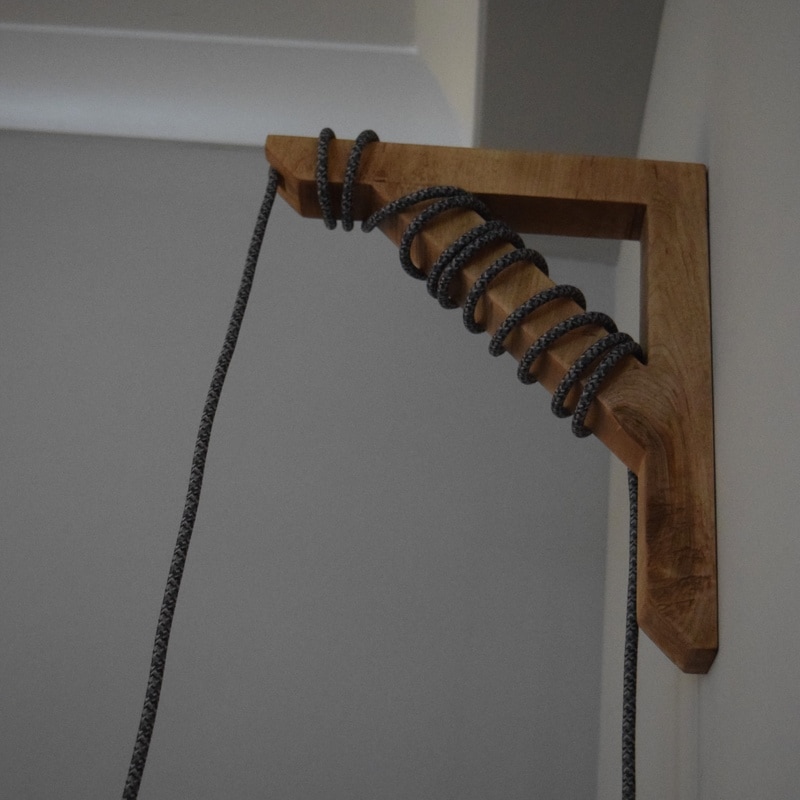
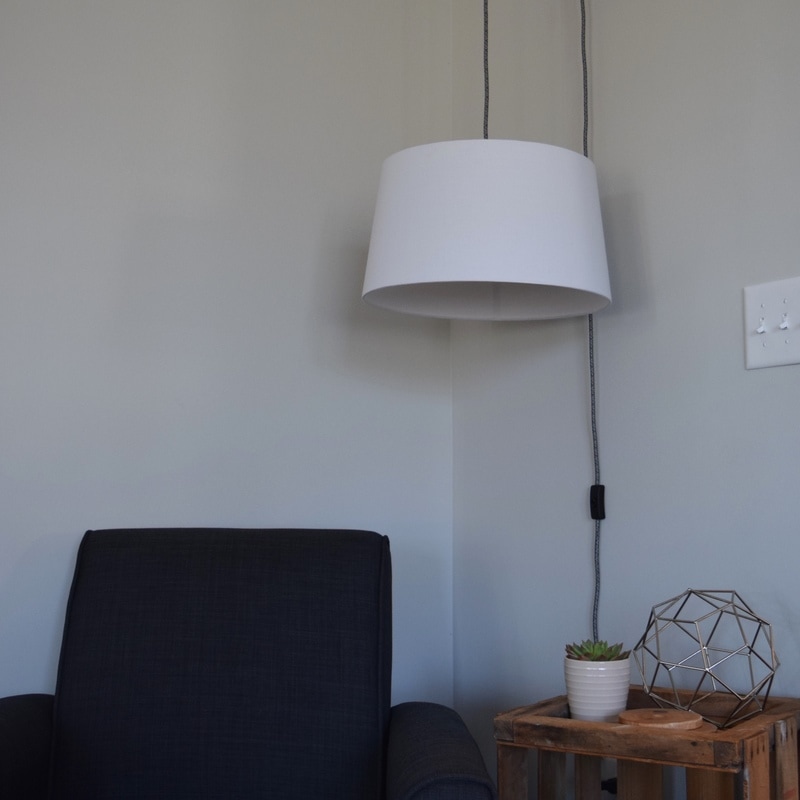
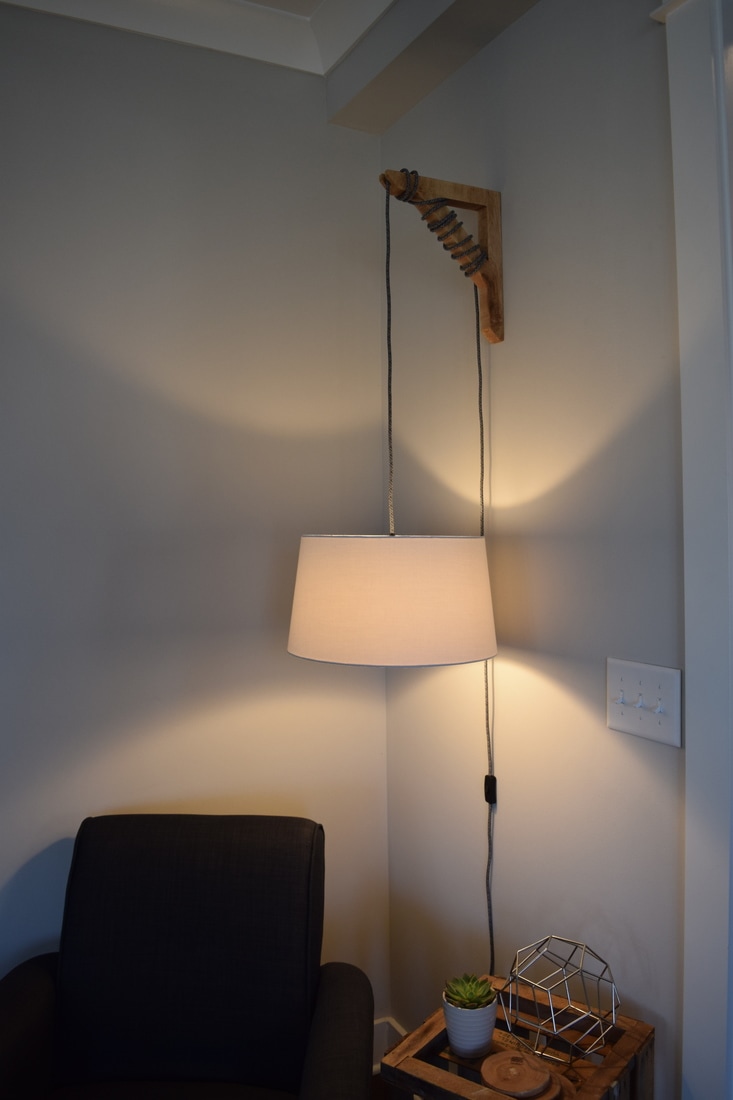
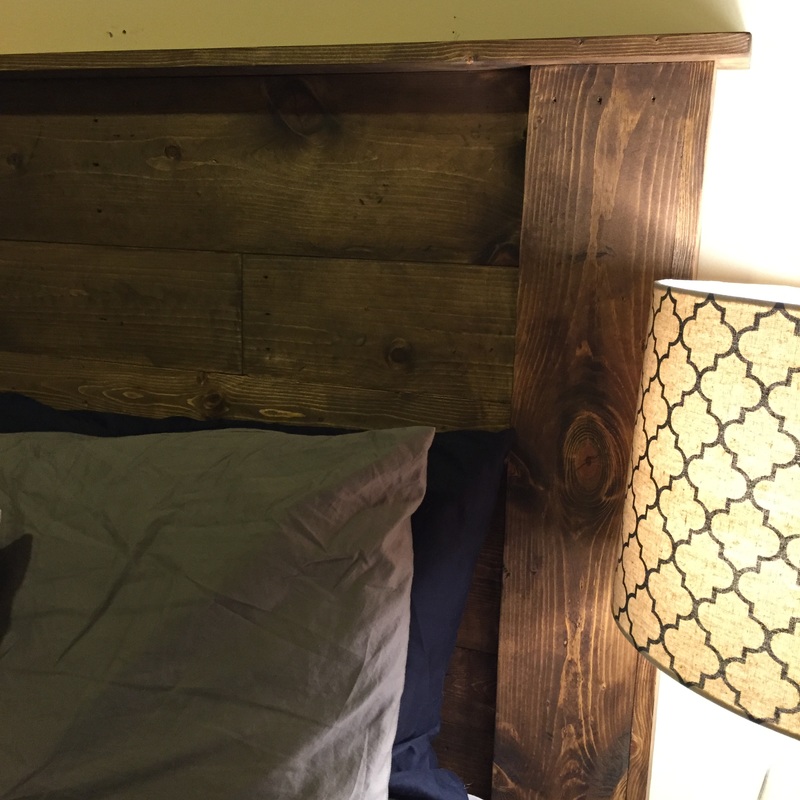
When we decided to take on a DIY Lighting Project, Mitch was in the process of building us the most beautiful dining room table. With that being said, we used our resources. (Stayed tuned for that table reveal on the blog!) Mitch saved a corner piece of the maple from cutting the table, and turned it into a 90* angle wall mount for our new plug-in pendant and taper shade. I had envisioned wrapping the cord to hang down, so we made a cutout where the cord could be wrapped and then added a notch to hold the cord in place.


What we used:
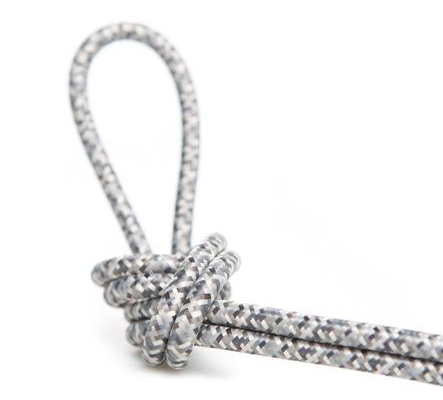
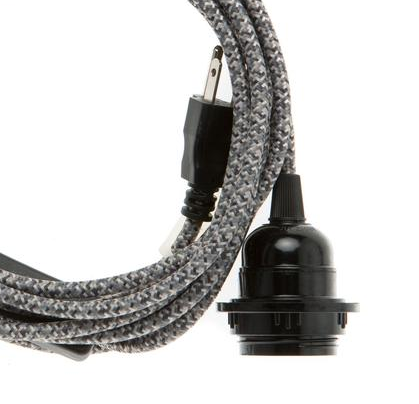
Standard Plug-In Pendant Light - Gray Tweed
Fabric Taper Shade - White/White

Do It Yourself:
 - Find a space to add some lighting
 - Shop online at the Color Cord Company for a cord that matches your space
- Make a wall mount using wood, a metal, piping, etc
- Firmly attach wall mount
- Add the cord
- Attach the shade
- Add the light bulb
- Turn it on
& enjoy :)

Be sure to share your lighting DIY's with us! We'd love to see your spin on this project!
Picture
1 Comment

This Is My Happy Place

2/13/2016

0 Comments

 
Picture

Our  Saturday morning has consisted of hitting snooze and sipping coffee.
This is for sure my happy place!

Shoutout to my hubs for the sweetest surprise -- A new headboard he handcrafted himself.
I feel like a real adult now!

Since I was away for 8 days while this was in the making, I thought it'd be fun to share a selfie I found on his phone ;)


Picture
Picture
Picture
0 Comments

Wedding Planning Printables

1/30/2016

1 Comment

 
Picture
As I was pursuing my undergraduate degree in Event Management, I always said there was NO WAY I would ever be a wedding planner. It turns out those feelings didn't last long. As soon as I began planning my own wedding, I feel in love with the process of making fun decisions and keeping things organized. Now when friends are asking me for resources and tips on planning their day, I've felt embarrassed sending them my boring Google docs. 

So...I've decided to start designing fun resources to help plan your wedding day! YAY! I know there are plenty of free downloadable resources out there, but you can never have too many choices. The content included in these designs are helpful for event coordinators, photographers, and of course the bride herself. 

These are a few examples of black and white layouts. Each style has a matching itinerary, but not all are shown. Style 5 gives you an idea of what it would look like printed on light brown kraft paper.
See something you like? OR Need documents with more/less space for your bridal party? Let me know and I'd be happy to make edits or send sets your ways. 

There are more designs and different helpful resources in the making. I'd love to hear your thoughts! For now, Happy Wedding Planning! 


1 Comment

Burlap Wreaths

1/8/2016

0 Comments

 
 Every Christmas I find a new DIY project to take on. Years past it's been blankets, scarves, headbands, etc. This year it was burlap wreaths! Simple yet elegant.

What You'll Need :
  • Wreath Frame
  • 30ft Burlap Ribbon
  • Wire
  • Flowers, Letters, etc. 

Quick How To :
  • Start by attaching the burlap to the inner wire of the wreath by stringing the wire through the burlap and tying into a knot 2-3 times to secure. You may fold the burlap in half for this step. 
  • Now that the burlap is attached, you will flatten it and begin pulling it between the *rings from underneath. Leaving about 1-2 inches of burlap in the inner, middle, and outer rings.
  • In order to repeat pulling the burlap from underneath - you will need to twist it twice after completing the outermost ring and begin again with the inner ring. The twists will remain on the back side of the wreath. (If using wired ribbon - Try to keep the wired side to the back.)
  • You will complete the steps above 4 times within each *section. 
  • Leaving one complete section free of burlap to have the space to be creative with flowers, letters, or any decor of your choosing.

*Rings - Refer to the inner, middle, and outer circle of the wire wreath frame.
*Sections - Refer to the portions of the wire frame that are separated by the vertical wires around the wreath.

Don't hesitate using YouTube or Pinterest for more visual directions!
Picture
Picture
Picture
Picture
0 Comments

Our DIY Wedding

7/15/2015

0 Comments


Mitch & Mikayla Meiss
>> 5.15.15 <<

Picture
Picture
Picture
Picture
Picture
Picture
Picture
Picture
Picture
Picture
Picture
<< Flower Girl 
+ 
Ring Bearer >>

Picture
Picture
Picture
Picture
Picture

>> Design It Yourself


Save the Dates
>> With the help of Shutterfly, I was able to upload pictures from our engagement and use our wedding color palette to make the perfect Save the Dates. 


Formal Invitations
>> It was my goal to save money and make personalized invitations. Thanks to one of my favorite photo editing sites PicMonkey and VistaPrint, I achieved both goals!


Personalized Ice Cream Cups
>> Mitch & I LOVE ice cream. To the point we eat it almost everyday! Because of that, we decided to have a build your own ice cream sundae bar for our wedding. We even went the extra mile to personalize it! 
Plain cups + A personalized label that matched out invitations
Wedding Photographer >> Taylor Atkinson Photography
0 Comments
    Picture

    Author >>

    Hi, I'm Mikayla! The wifey and mama behind the blog! Sharing with you a bit about our life, style, & things we love!

    Categories >>

    All
    DIY
    Events
    Faith
    Fashion
    Food
    Gift Guides
    Home
    Proposal
    Recipes
    Travel
    Wedding
    Wood Working

    Let's Get Social >>

    Follow

    RSS Feed

Powered by Create your own unique website with customizable templates.